7 Best Corner Clamps for Woodworking The Ultimate Practical Guide
7 Best Corner Clamps for Woodworking:
The Ultimate Practical Guide

Corner clamps for woodworking are one of those tools you don’t realize you desperately need until you’ve tried to hold two glued boards at a perfect 90° angle with just your hands.
If you’ve ever built a picture frame, a drawer box, or a cabinet carcass, you know the frustration. One piece slips. The joint goes out of square. The glue sets before you can fix it. Corner clamps solve that problem completely.
This guide covers the 7 best types, how to use them step by step, which projects they’re best for, and the most common mistakes to avoid.
Table of Contents
- What Are Corner Clamps for Woodworking?
- 7 Types of Corner Clamps for Woodworking
- How to Use Corner Clamps: Step-by-Step
- Pro Tips from Experienced Woodworkers
- Best Projects for Corner Clamps
- How Many Corner Clamps Do You Need?
- How to Choose the Right Corner Clamp
- Top Recommended Corner Clamps
- Common Mistakes to Avoid
- Frequently Asked Questions
01 DefinitionWhat Are Corner Clamps for Woodworking?
Corner clamps for woodworking (also called right-angle clamps) are tools designed to hold two pieces of wood at a precise 90-degree angle during gluing, drilling, or fastening.
Instead of holding boards with one hand and driving a screw with the other, a corner clamp locks your workpieces in position so you can focus entirely on the joinery.
02 Types7 Types of Corner Clamps for Woodworking
Not all corner clamps for woodworking are built the same. Here are the 7 main types and when to use each one.
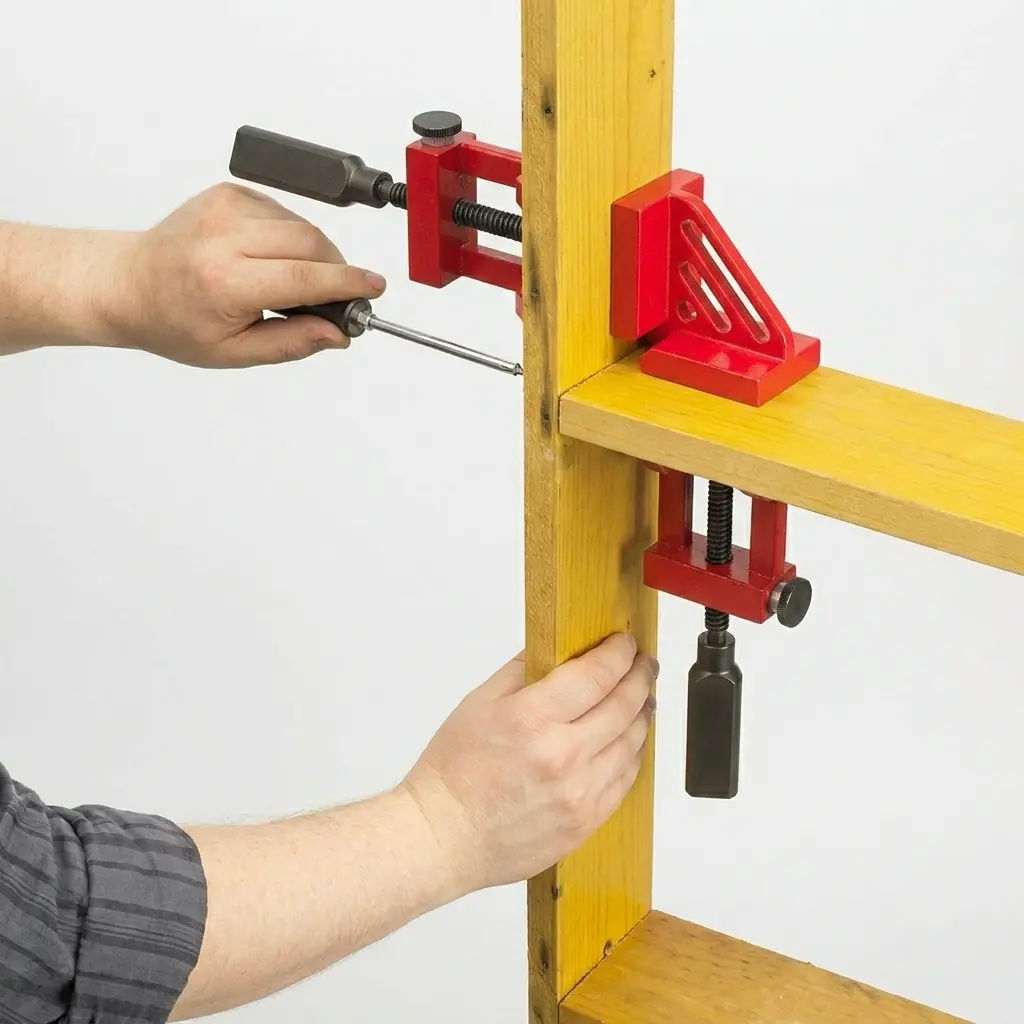
Single-Screw (Self-Centering) Corner Clamps
These feature a fixed 90-degree bracket and one movable jaw operated by a single screw. The self-centering jaw distributes pressure evenly across both boards automatically the most recommended type by professionals.
The tradeoff: you often need to hold both pieces in place while tightening, which can be tricky when working alone.
✦ Best for: Quick assemblies, T-joints, general joineryDual-Screw Corner Clamps
Two independent jaws, each with its own tightening screw. Lets you secure one board first, then bring the second into position. Ideal for limited hand strength or slippery glued surfaces.
Many experienced woodworkers from forums like LumberJocks and WoodworkingTalk prefer these for solo work.
✦ Best for: Solo woodworkers, miter joints, beginnersClamp Squares / Right-Angle Jigs
Large, flat L-shaped squares used alongside standard bar or F-clamps. They don’t apply clamping pressure themselves they hold geometry. Use your other clamps for the pressure.
✦ Best for: Cabinet and box assemblies, multiple cornersStrap Clamps with Corner Pieces
A long strap threads through four 90-degree corner brackets and wraps around the entire project. Tightening pulls all four corners inward at once the go-to for picture frames, drawer boxes, and cabinet carcasses.
✦ Best for: Frames, boxes, any 4-sided glue-upWooden / DIY Corner Clamp Jigs
Build your own with scrap wood and tapered wedges. Four of these jigs on a flat surface keep a project perfectly square and level. Detailed plans on Fine Woodworking.
✦ Best for: Budget builders, custom thicknessesSpring Corner Clamps
Small, lightweight clamps using spring tension for temporary holding. Apply limited pressure, suited to light-duty or quick positioning tasks only.
✦ Best for: Quick positioning, small craft projectsHeavy-Duty Aluminum Corner Clamps
Machined from solid or anodized aluminum alloy for maximum precision and durability. Sets often include multiple sizes for small and large projects alike.
✦ Best for: Professional use, furniture making


03 How-ToHow to Use Corner Clamps for Woodworking
Follow these steps to get a perfect corner joint every time.
- 1Dry-Fit First
Assemble your pieces without glue. Make sure everything fits and corners are cut accurately. No clamp can fix a 91-degree corner.
- 2Apply Glue
Spread wood glue evenly on mating surfaces. Don’t over-apply too much glue prevents joints from closing properly.
- 3Position the Clamp
Place one board into the clamp’s 90-degree bracket. With dual-screw clamps, tighten one jaw to secure the first board before touching the second.
- 4Bring in the Second Board
Slide it into position, ensuring surfaces are flush. With single-screw clamps, hold both boards firmly before tightening.
- 5Check for Square
Before glue sets, verify with a combination square or measure diagonals. Equal diagonals = square. Adjust now, not after the glue dries.
- 6Tighten Firmly
Apply firm, even pressure. Avoid over-tightening this crushes wood fibers and can shift joints out of alignment.
- 7Clean Up Squeeze-Out
Wipe excess glue with a damp cloth while still fresh. Dried squeeze-out is much harder to remove cleanly.
- 8Add Fasteners if Needed
Drill pilot holes and drive screws while the clamp holds everything square. Then remove the clamp and finish tightening.
04 Expert AdvicePro Tips for Using Corner Clamps for Woodworking
These tips come directly from discussions on woodworking forums and communities.
05 ApplicationsBest Projects for Corner Clamps for Woodworking
Picture Frames & Mirror Frames Mitered 45° corners are notoriously slippery during glue-up. A strap clamp with four corner pieces is the best solution.
Cabinet Carcasses & Bookcases Clamp squares hold shelves and sides square while you drive pocket screws or apply bar clamps. Many woodworkers use 4–8 clamp squares simultaneously for large cases.
Drawer Boxes Corner jigs for squareness plus strap clamps for pressure is the winning combination for boxes of any size.
Furniture Assembly Tables, benches, and chairs all have right-angle joints that benefit from corner clamps during glue-up.
Small Boxes & Keepsake Chests Dual-screw corner clamps excel here: tight, compact, and easy to maneuver in small spaces.
06 Quantity GuideHow Many Corner Clamps Do You Need?
This is one of the most common questions among beginners. Here’s a practical breakdown:
| Project Type | Recommended Quantity |
|---|---|
| Picture frames, small boxes | 2–4 clamps |
| Drawers, medium boxes | 4 corner clamps + 1 strap clamp |
| Cabinets & bookcases | 4–8 clamp squares + bar clamps |
| Full production shop | Mixed set of all types |
Many experienced woodworkers maintain a mixed collection covering roughly 90% of common projects.
07 Buying GuideHow to Choose Corner Clamps for Woodworking
Jaw Capacity / Opening Size Check the maximum jaw opening against your material thickness. Most clamps range from 1.5″ to 3″, covering most dimensional lumber and plywood. Heavy-duty models reach up to 80mm (~3.15″).
Material & Durability Aluminum alloy clamps balance lightweight handling with corrosion resistance. Steel is more rigid but heavier. Avoid cheap plastic for anything beyond very light craft work.
Clamping Pressure Some corner clamps are alignment tools only. If you need to pull joints tight, look for robust screw mechanisms or plan to pair with bar or strap clamps.
Ease of Use Ergonomic rubber handles, one-handed operation, and rotating swing jaws reduce frustration significantly when working solo.
Joint Compatibility Verify the clamp suits butt joints, miter joints, T-joints, or all three.
08 RecommendationsTop Recommended Corner Clamps for Woodworking
| Clamp | Best For | Key Strength |
|---|---|---|
| Bessey WS-3+2K Angle Clamp | General woodworking | Durability, ease of use |
| Milescraft ClampSquare | Cabinet & frame assembly | Large format, works with any clamp |
| Bessey Strap Clamp | Frames & boxes | Even pressure on all 4 corners |
| Kreg KHCCC Corner Clamp | T-joints & pocket screw joinery | Perfect for pocket hole work |
| Woodpeckers M2 Box Clamps | Box construction | Precision machined, very accurate |
| CRAFOM Aluminum Alloy Set | Versatile everyday use | Durable, comes in two sizes |
| DIY Wedge Jigs | Budget-conscious builders | Free to make, fully customizable |
For in-depth reviews and testing, Bob Vila’s right-angle clamp guide covers 7 tested models with detailed performance notes.
09 Common ErrorsCommon Mistakes to Avoid with Corner Clamps for Woodworking
Too much pressure bows wood, crushes fibers, or shifts joints on slippery glued surfaces. Firm and consistent beats tight and aggressive.
Always assemble without glue first. Discovering a gap mid-glue-up causes panic and poor results.
Even a perfect corner will rack if your workbench isn’t flat. Always work on a flat, stable substrate.
Corner clamps maintain geometry they cannot correct a bad cut. Accurate sawing is the real foundation.
Metal jaws will dent soft woods. Always use jaw pads or shims between the clamp and workpiece.